Tuesday, November 17, 2009

TWD Sugar-Topped Molasses Spice Cookies

I wish I would have realized how good these molasses cookies were a few days earlier. I definitely would have substituted them for the boxed gingersnap cookies I used in my Sweet and Sauerbraten recipe I posted here earlier. Next time I will, for sure!


These are my new favorite, non-decorated cookies ~ ever! Sweet and crunchy on the outside with a mellow, spicy soft center. So good! Smells just like the holidays should!!
This recipe can be found on page 77 of "Baking From My Home To Yours" By Dorie Greenspan
Thanks Dorie! Another winner!!
Happy Thanksgiving everyone!

Sunday, November 15, 2009

"German" Onion Soup with Garlic Croutons

Okay, so who doesn't love French Onion Soup? I'm not sure I know of anyone who doesn't. French Onion Soup is actually what I set out to make one Sunday afternoon. That is, until my brain decided to play around with the classic and take a detour to Germany. What I came up with is, in a word ~ Wunderber!

In a large stock pot on medium high heat, caramelize 8-10 sweet onions that have been sliced thin, in 2 T. olive oil and 2 T. butter. Add salt and pepper to taste. The carmelazation process will take approximately 20-30 minutes. When the onions are golden brown, add 2 T. all purpose flour and stir to combine. Lower the heat to medium and continue to cook and stir an additional few minutes.

Meanwhile in a small sauté pan, cube fresh bread (this night, I think I used 3 or 4 left over hot dog buns) in 1 T. butter, 1 T. olive oil and 1 t. garlic powder. Sauté until crisp and golden. Set aside. Now comes the fun part. To the onions, add 4 C. beef stock along with 3/4 C. any type beer of your choosing. Continue to cook and stir on medium heat until soup starts to thicken. Add 2 t. Dijon mustard, grated nutmeg (to taste), 1 t. packed brown sugar and 1 T. fresh thyme leaves. Now, what fantastic meal wouldn't be complete without, you guessed it...CHEESE! Add between 6-8 ounces of grated Greyére cheese to the soup and stir until combined and melted.


Well, you've been patient long enough so here is the finished dish you've been waiting for!!! I do hope you'll give this soup a try and let me know how you liked it. For me, I know I'll be making it often during the long Winter months and I hope you do to. Glücklicher Essen (happy eating)!

Thursday, November 5, 2009

Not all cookies, all the time!

I recently purchased the book by Dorie Greenspan "Baking from my home to yours" in order to join the baking group "Tuesdays with Dorie". I loved paging through the book and having my mouth water at all the delicious recipes and photo's.

I'm not positive that I will actually join the group at this point. The fact that you must bake at least two recipes per month is a bit daunting to me. I may just blaze my own trails and bake what I choose, when I choose. I'm the type of person who when told I must do something by a certain time or date, will never finish the project or even attempt to start. Call me stubborn if you will, or just know, I don't like following most directions.

Which brings me to cookbook directions. I NEVER follow a recipe. I use them as possible suggestions and always tweak them in whatever form I choose as the time.
Because of this fact, nothing ever turns out the same way twice. Not a bad thing, mind you (as most everything turns out relatively well) but nearly impossible to recreate because I don't write anything down that I've added.

I think I'm this was for several reasons. 1 - it's genetic. My grandpa Hugo always cooked that way and 2 - when I was a little girl I watched all the cooking shows on PBS (Julia Child, Frugal Gourmet etc). They never seemed (In my young mind), to follow a recipe. They just had stuff on the counter that they added from here or there, as much or as little as they wanted. It always looked like so much fun to throw stuff together. After all...it's only food, how bad can it turn out, right?

Well, this first recipe I made from Dorie's book "Orange Berry Muffins" was no different. I didn't make a big step out of the box on this, just my little toe snuck out. The only thing I did different was I sprinkled them with sugar before baking to give a light crunch on the top. I restrained myself from doing more. They turned out fabulous!!!


The muffins were so light in texture and had just a hint of orange flavor. I overloaded them with blueberries (guess I didn't follow the recipe on that part either, lol) so when you broke them open, there was more blue than anything else.
That's OK with me, blueberries are good for you, right? I served them to friends last evening and they got rave reviews! The only thing I might do different next time is add a splash of vanilla (what can I say).

Here is a picture of me, taking a picture of me in the mirror. Yes, I am wearing clothes under my apron. I have never (yet) worn just my apron while baking or cooking
(much to my husbands dismay).
Nice to meet you and thanks for reading my ramblings!

Fondly yours,
Renee

Bacon and Cheddar Crackers

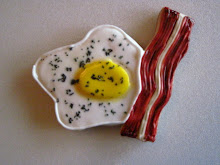
While I am still trying to learn the ins and outs of proper blogging (and picture taking) I thank you for viewing my potential progress and hopefully add your comments and suggestions. I aspire to improve my abilities in the blogging arena as I am truly enjoying myself.

I saw a recipe posted yesterday that sounded so good and so tasty I just had to add it to my plans for the day. For those who know me well, you know I can not follow a recipe without putting my special tweak to it. Good or bad, it's something I do and can't seem to stop myself. I've taken a lot of grief for this over the years but that is what makes cooking and baking so much fun for me. No rules and nothing set in stone.

There is one exception to this however, when baking Kudos Kookies. I can't mess with this recipe as it is something that needs to remain the same. Happily and willingly, I resist that urge.

Here is the recipe and steps I followed for making this totally delicious and savoury cookie.

Assemble the following ingredients:
1/2 lb. thick sliced bacon that has been cooked crisp and chopped finely
2 C. all-purpose flour
1/2 t. cayenne pepper
1/2 t. black pepper**
1 t. sugar**
1 T. fresh chopped rosemary**
1 C. finely shredded sharp cheddar cheese
1 stick softened butter (I used unsalted)
1 large egg and 1 egg yolk
2 T. heavy cream
** denotes my "tweaks" to the original recipe


In the bowl of a stand mixer, combine the flour, cayenne pepper, black pepper, butter, eggs, salt, sugar, rosemary, and cream. Mix until well combined. The dough will be relatively stiff. If you feel a need (I did) add a splash or two of more cream (how bad can that be?).


When the dough is thoroughly mixed, add the chopped bacon and cheddar cheese and mix with your hands to combine. You gotta get your hands a little dirty, right?


Turn the dough out onto a lightly floured surface and roll into 2 logs about 1 1/2" around. Wrap each log in plastic wrap and chill for at least two hours.


When your dough is finished chilling, you're now ready to pre-heat your oven to 350 degrees. Cut the dough into 1/4" thick slices and place them about 1/2" apart on a baking sheet lined with parchment paper.

Now your ready to bake your savoury cookies for 18 to 25 minutes or until the cookies are a wonderful golden brown.


Cool and devour! Simply delicious and so, so easy. Enjoy! Now, go try it and don't be afraid to make your own changes! It's only food :)

I would be remiss without making a special shout-out to The Baking Blog for the original posting of this recipe. Thanks so much!

Fondly, Renée

Rustic Potato Loaves

After looking through my "Baking With Julia" cookbook (written by Dorie Greenspan), I decided that the first recipe I'd like to make is for Rustic Potato Loaves. Let me tell you, I am SO happy I did! This is the most wonderful tasting, easy to make bread I think I have ever had or made. They are moist and tender inside with a wonderfully thick and hearty crust. The flavor is out of this world!

Sometimes, the simplest recipes are the best tasting. This one only has 6 ingredients. Boiled, unpeeled potatoes, salt, potato cooking water, active dry yeast, extra-virgin olive oil and all-purpose flour. I suppose you can peel the potatoes if you'd like, but I followed the recipe which said not to. To me, seeing the flecks of potato peel running through the dough certainly adds to this breads rustic appeal (no pun intended).

It was raining on this particular day so the dough was a bit too sticky in my estimation. An easy fix because all I needed to do was add a touch more flour than was originally called for. This was the first time I had ever used the dough hook attachment on my stand mixer. I usually like do my kneading by hand but with a total of 11 plus mixing minutes called for, I'm very glad I did.

.
With two rising times and approximately 50 minutes of baking in a 375 degree oven, here are my two wonderful and rustic looking loaves


I tried to stay away as long as I could while they were cooling but these loaves kept calling my name. As you can see, I ate several pieces... in a row! My original intent was have a small taste. Seriously, I couldn't stop myself, they are that good!!


These loaves should be stored at room temperature and once sliced, should be kept sliced side down on a cutting board. They will stay fresh for two days at room temp. or you can wrap and freeze for up to a month. I can tell you this, this bread will probably be gone tonight as I can now hear French Onion Soup calling my name!

If you're interested in reading this entire recipe, you can find it on page 138 of "Baking With Julia". I suggest you run, don't walk, to find your copy and make these just as soon as you can!!!

TWD - Chocolate Souffle

With this being my first "Tuesday's With Dorie" post, I am excited and nervous to show how my soufflé turned out.

The day I made it I had concerns that it wouldn't turn out. Mostly because of my limited soufflé experience and because it was a rainy, humid day. I wasn't sure if a soufflé was as closely associated with meringue as I had imagined, but still I carried on.

I made sure I assembled all the ingredients beforehand and was extremely happy with myself for actually remembering to let my eggs and milk come to room temperature before starting out. I then buttered and sugared my soufflé dish and added it to the refrigerator shelf, in wait of the soon to follow chocolaty goodness.

I followed the recipe to a T (well, almost). I made myself a mock double boiler, added the chocolate and sugar and melted the mixture on top of the stove. I had to stop myself from actually melting the chocolate in the microwave, as I would have normally done. The only part I did different from what the recipe called for was I added a pinch of salt to this mixture. After all, I am who I am. When the chocolate mixture was cool, one by one I whisked in my egg yolks with hopeful anticipation.

The beating of the egg whites seemed only to take moments and at that point I had feared I'd over beaten the poor little things in my zealous eagerness. I carried on, and added in my 2T. sugar in a steady stream until those little babies were glossy and beautiful. Then and there, I knew things would be okay.

I'll be the first to say, my folding technique needs work. I tried to be as gentle as possible, all the while grinding my teeth (a very bad habit I've gotten into recently while cooking/baking). Well, enough about that!! With the soufflé in the oven, and the oven light on, I waited, watched and smelled the wonderful aroma fill the house.

Here is my finished Chocolate Soufflé ~ This recipe was so easy and the taste is out of this world! The only thing I will do different next time is use a smaller soufflé dish for a more dramatic presentation. Oh, and maybe make it on a sunny day (because I still don't know if that made a difference).

We ate the entire thing for lunch that day...seriously! In the words of Ina Garten "How bad can that be?" And to think, I was afraid we would have leftovers!

This recipe can be found on pg. 406 of "Baking From My Home to Yours" by Dorie Greenspan. I highly recommend it!! One recipe down, many more to go...
Fondly ~ Renée

TWD Flakey Apple Turnovers

I was very excited to try this recipe as it brings back fond memories from my childhood with my mom serving apple turnovers as a special treat after dinner. Because I haven't made many pastry doughs in my lifetime, I was a bit nervous as well. However, I was ready to give it my best shot.

I had been tempted to use my food processor to mix up the dough but decided I'd follow the recipe as written. Using my pastry blender at first, I mixed in the 3 sticks of cut up butter and then the sour cream and sugar mixture.

At this point I was worried. The recipe said the dough would be soft, but mine was more of a crumbly mess and didn't resemble a dough at all. More like some sort of streusel topping. Yikes! The only thing I thought to do at this point was to get my hands involved with the actual blending. I was hoping that the warmth from my hands would soften the butter and bring this mess of a dough together. Eureka, it worked! I wish I would have done that sooner but I didn't want to overwork the dough and lose the potential "flaky" factor I was hoping for.

The other saving grace was the wrapping of the dough in plastic wrap and the extended chilling time in the fridge. I had mixed up my dough on Friday and filled and baked my turnovers on Saturday in order to serve them to our friends coming over for dinner that evening. They brought the vanilla ice cream!


Enough talk. Here are my finished turnovers. Flaky, tangy and sweet.


Needless to say, they were a huge hit!! I will definitely be making these again in the future.

Garlic and Thyme Pretzel Bites


This recipe is SO GOOD and SO EASY I just have to share it. I've made them twice in the past week and everybody loves them!! These make perfect game day snacks or appetizers for an Oktoberfest gathering. I'd like to call them "comfort snacks". Is that so wrong??
Here's how to make them:

4 t. active dry yeast
1 t. white sugar
1+1/2 c. warm water (110 degrees)

5 c. all purpose flour
1/2 c. white sugar
1+1/2 t. kosher salt (plus more for topping)
1 T. fresh thyme leaves
1 t. garlic powder
1 T. olive oil

1/2 c. baking soda
4 C. boiling water

1/4 c. Parmesan cheese (optional)

1. In a small bowl, dissolve yeast and 1 t. sugar in warm water. Let stand until foamy (about 10 minutes)

2. In a large bowl, mix together flour, 1/2 c. sugar, salt, garlic powder and thyme leaves. Make a well in the center of your dry ingredients and add the yeast mixture. Mix with hands to form into a soft dough. Depending on the weather, you may have to add more warm water (1 T. at a time) or possibly flour. You don't want the dough too sticky or overly dry.

3. Turn the dough out onto a lightly floured surface and knead until smooth and elastic (about 7-8 minutes). Lightly oil a large bowl. Place the dough in the bowl and turn to coat the dough with oil. Cover with plastic wrap and let rise in a warm place until doubled in size, about 1 hour. When dough has risen, punch down to deflate dough.

4. Preheat over to 425 degrees. Meanwhile, on stove top in a large pot, bring water and baking soda to boil.

5. Breaking off golf ball sizes of dough, roll dough in the palms of your hands and drop into boiling water until the dough balls rise to the surface of the water and float. Do not overcrowd the pot. You will have to do this in batches.

6. Remove dough balls from water using a slotted spoon and place on 2 parchment lined baking sheets, making sure they do not touch one another. Sprinkle dough with additional kosher salt and Parmesan cheese if desired (buy why wouldn't you?).

7. Bake in a preheated oven for 18-20 minutes, rotating the sheet pans half way through the baking process.

Here is my second batch all wrapped and ready to go to Oktoberfest! They were a complete hit and a great accompaniment to some good German beer!!
You may want to serve them with a honey mustard dipping sauce or a dipper of your choice, but it's certainly not necessary. These have enough flavor all on their own and you won't be disappointed. Enjoy!!!

TWD Split-Level Pudding


Believe it or not, this is the first time I've made pudding from scratch. It always seemed too time consuming when the box brands were "good enough". Well, my thoughts have changed after trying this recipe. This was very easy to make and the taste was superb. Far better than those instant puddings. Don't get me wrong, I'll still buy those little boxes, but for special occasions, this is the pudding I'll choose to serve.

The only thing I will do different in the future when making this recipe, is omit the use of the food processor. Even though the recipe calls for it, I didn't find it at all necessary. In fact, I found it made pouring the mixture back and forth between it and the pan on the stove top awkward and unnecessary. I also feel it added too much froth to the vanilla layer, making it take longer to thicken.

As you can see, I served my Split-Layer Pudding in wine glasses to better show off its pretty layers. The only adjustment I needed to make in doing this was to cool off both the layers of pudding before adding them to the glasses. I didn't want to take any chances of having the wine glasses crack by adding too hot a substance.

The results were quite pretty and very tasty. I sprinkled the top with ground cinnamon and served them for dessert that night. Everyone was happy and we all scraped our glasses clean.


This recipe can be found on pages 384-385 of "Baking From My Home To Yours" by Dorie Greenspan. I highly recommend this book. I have enjoyed each tasty treat I've made so far and am sure I will continue to do so with future recipes.

TWD Sweet Potato Biscuits!

Over the past several years I have developed a MAJOR love of sweet potatoes! Before that time, I would have never, in a million years, chosen to eat a cold sweet potato biscuit. Now, as I sit here and type this, I am eating the last sweet potato biscuit, cold, right out of the fridge before anybody else can get to it :) Yep, I love them all right.

This recipe was simple. So simple in fact I thought for sure I was missing some steps or ingredients. Several times, I had to go back to the recipe and re-read it to make sure I was following it correctly. When the biscuits were cut and ready for the oven, I brushed them with cream and sprinkled them with black pepper. Dorie's recipe did not call for those final steps but I thought they would make a tasty addition.

I do believe I worked my dough just a little too much in making these simple little biscuits. I was expecting them to rise and brown more than they did (especially with the addition of the cream) but this is how they turned out. Sadly, they really didn't look much different baked than they did unbaked.

Even though my biscuits didn't rise or brown as I would have liked, they were very, very tasty!!! We ate them as an accompaniment to leftover chicken noodle soup one evening. What a simple way to elevate a leftover meal and make it something extra special! Very comforting. Even cold :)
This recipe can be found on page 26 of "Baking From My Home To Yours" By Dorie Greenspan.